The challenge here is to create grass-free growing areas in a VERY short space of time. I moved to Bishopstone on the 20th January 2023 and I plan on planting out my first seedling and doing direct sowing this spring. If I had been setting up a growing project in London, I would start off by killing off the grass by using cardboard topped with woodchip. Both resources are freely available and do and excellent job of: killing off grass; keeping the soil temperature and moisture content stable; providing slow-release nutrients; being a habitat for invertebrates; encouraging fungally dominant soil; and boosting the soil food web generally. A healthy soil food web = healthy plants so I’m a bit fan of doing all I can to increase the number of little beings. But, I digress. In order to conform to organic food growing standards, I’m not allowed to use cardboard or newspaper and so am experimenting with various combinations of plastic, wool and woodchip.
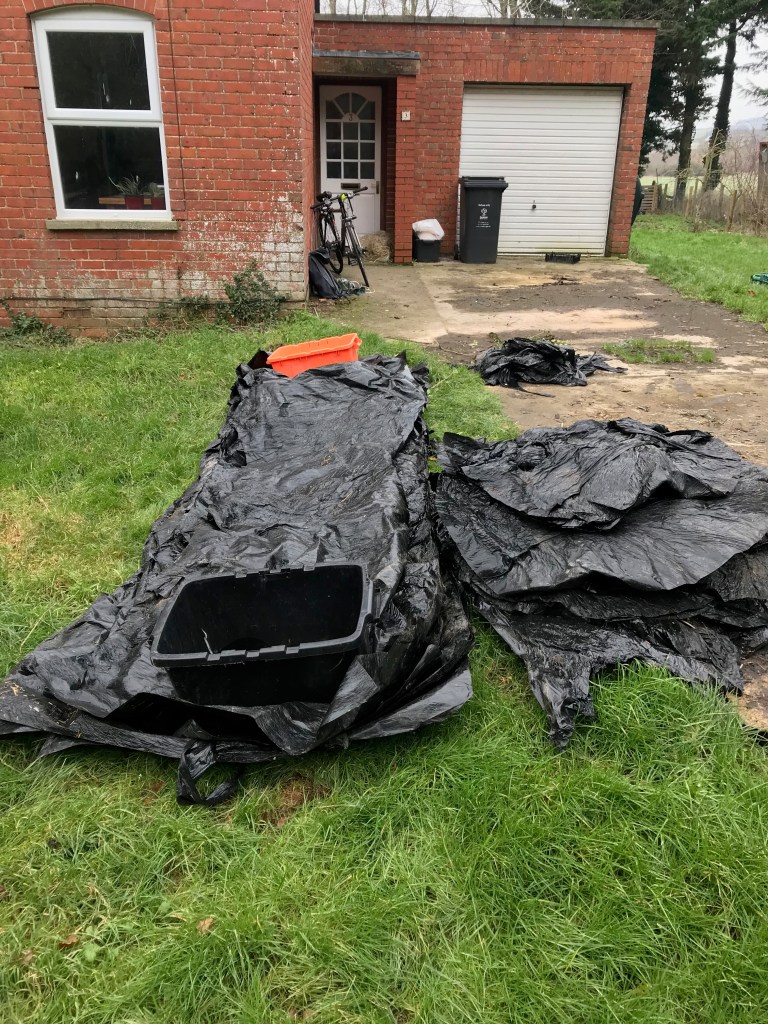
There’s a lot of repurposing and recycling going on: old silage wraps, wool that can’t be sold and, old coat hangers and even some discarded slate tiles I found in my back garden. The wool came from a large barn located opposite Barn Field. It was loaded into large builders’ bags and wheelbarrowed into the field. The woodchip came from the yard outside the barn and was wheelbarrowed in. At one point a tractor driver, Phillip, was hired to deposit several loads of woodchip to the end of some of the rows. The plastic was ordered online, apart from the repurposed silage wraps. Each of these was about 3.5 m long and they were held down with coat hanger wire pegs. The lawn turfer was rented from HSS tool hire.
Here are the approaches:
- Row 1, red plants 2 parallel rows of plastic with a 30cm gap between. Mound of woodchip overlapping with plastic, approx 30cm tall. Plastic is repurposed silage wrap pegged down with repurposed coat-hanger pegs.
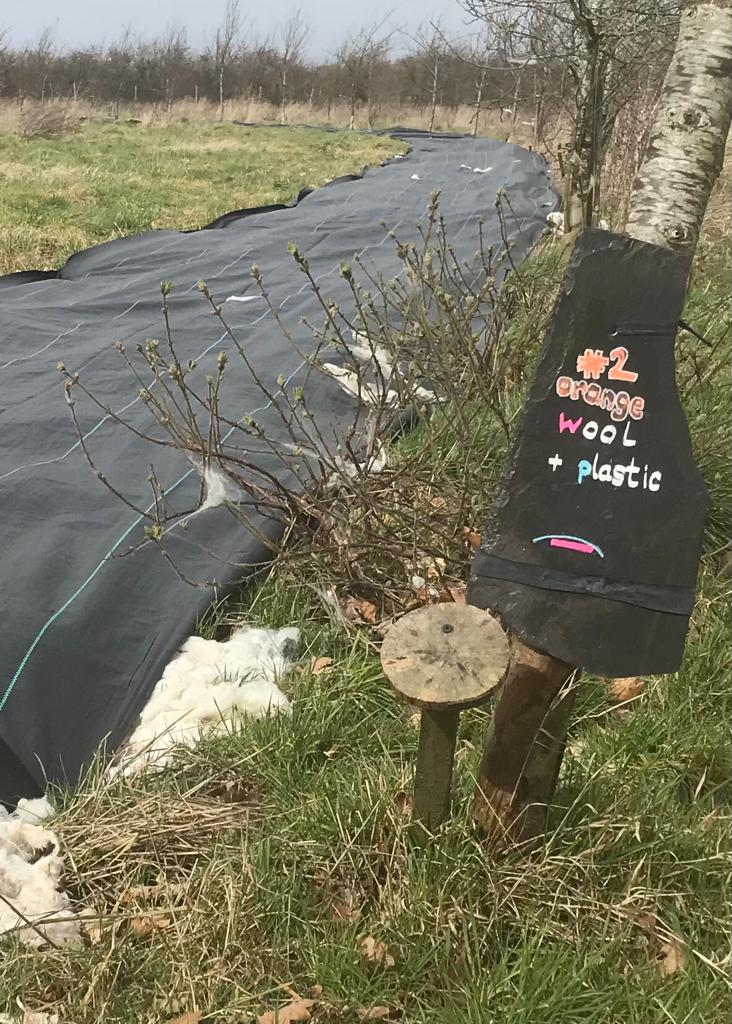
- Row 2, orange plants Wool (20cm deep, 1m wide) with 2m wide strip of plastic on top. Wool is too cheap for the farm to sell at present so is, shockingly, a waste resource.
- Row 3, yellow plants grass stripped with lawn turfer, flipped upside down, covered with 2m wide strip of plastic. Plastic is purpose bought but will be re-used. Brand only purchased because it was advertised as having metal pegs. Arrived with plastic pegs.
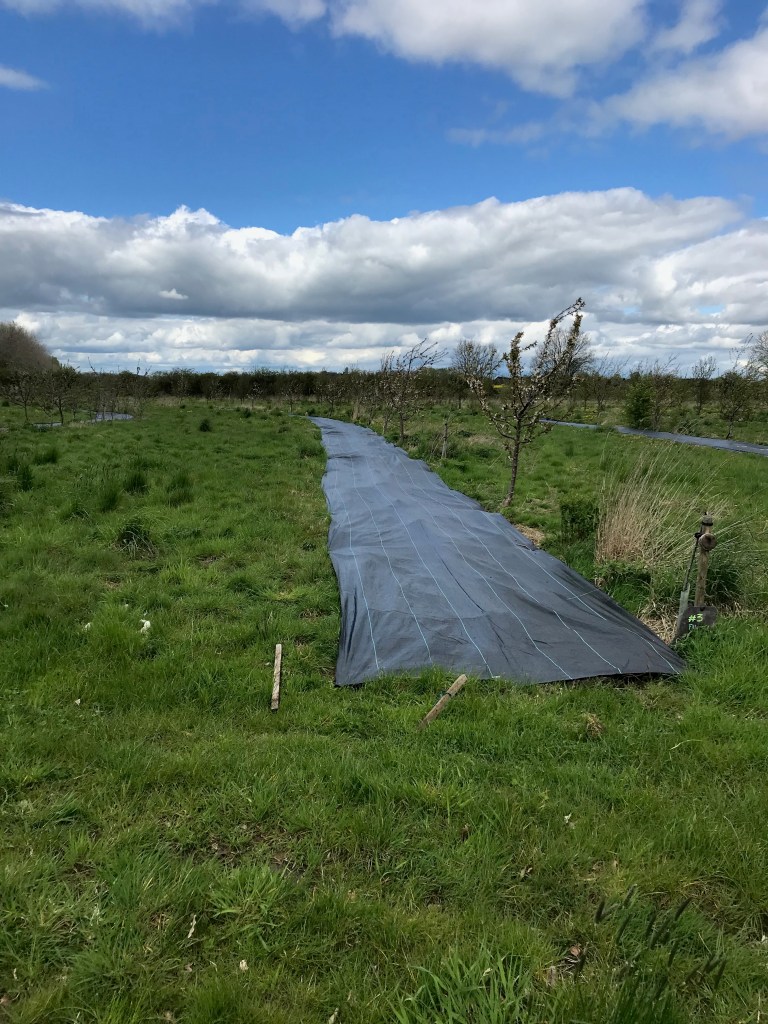
- Row 4, green plants 2m wide strip of plastic.
- Row 5, blue plants grass stripped with lawn turfer, flipped upside down and covered in woodchip.
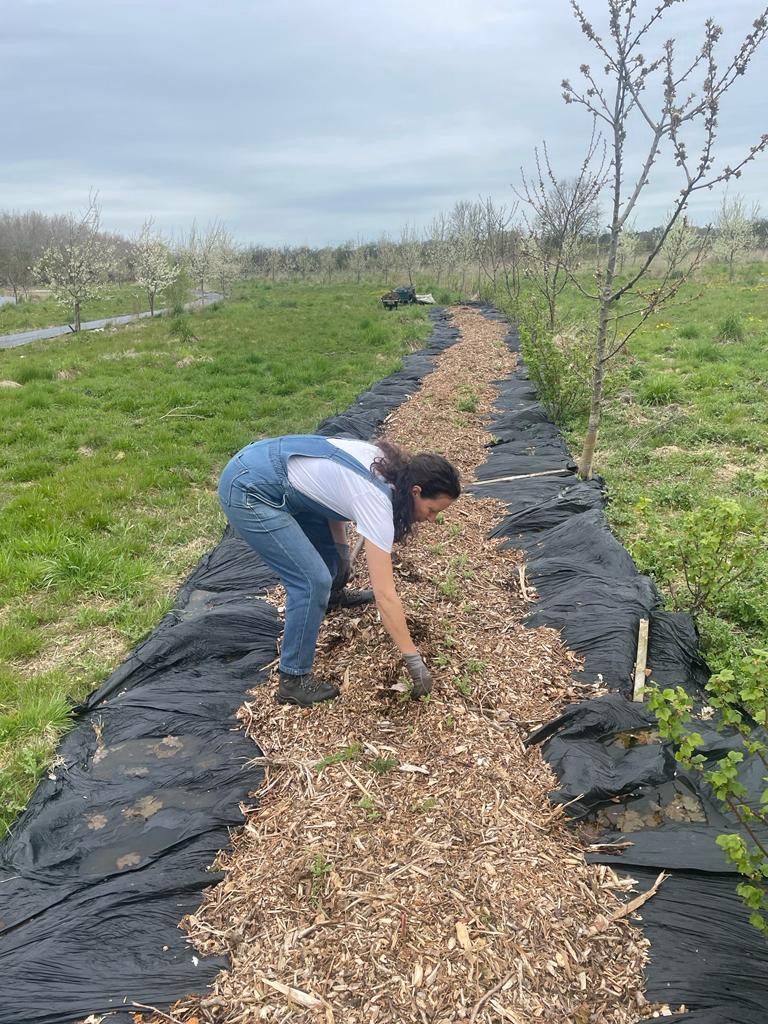
- Row 6, indigo plants Well rotted woodchip (15cm deep, 1m wide) covered with 5cm fresh woodchip.
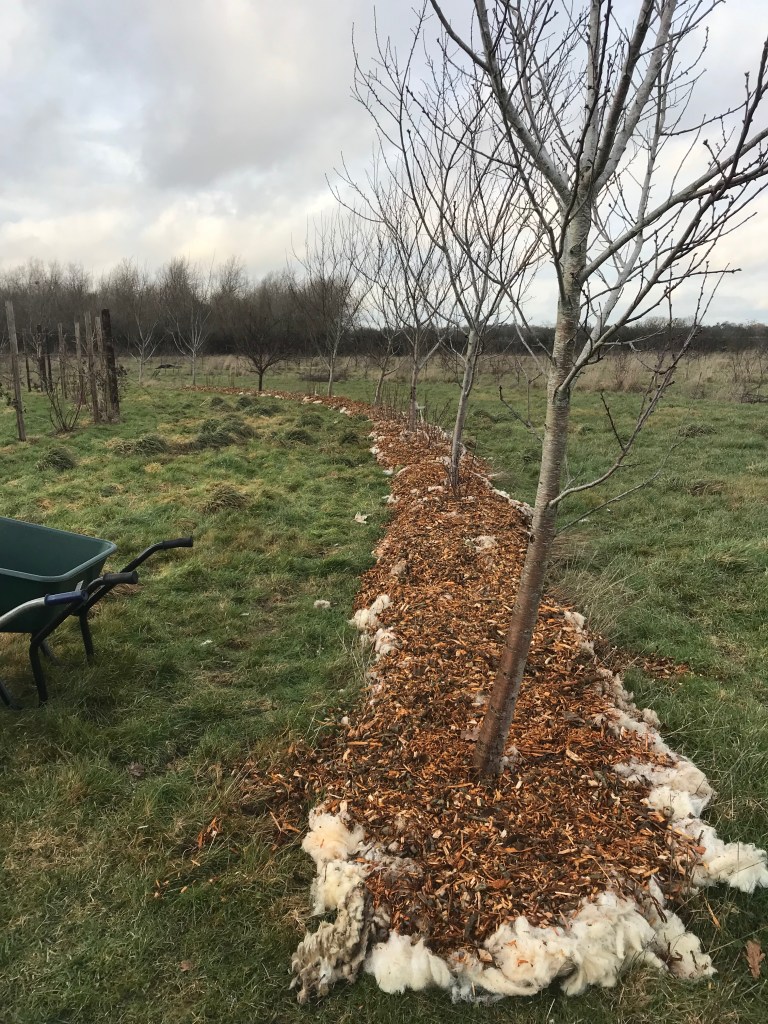
- Row 7, violet plants Wool (20cm deep, 1.5m wide) with 5cm woodchip on top.
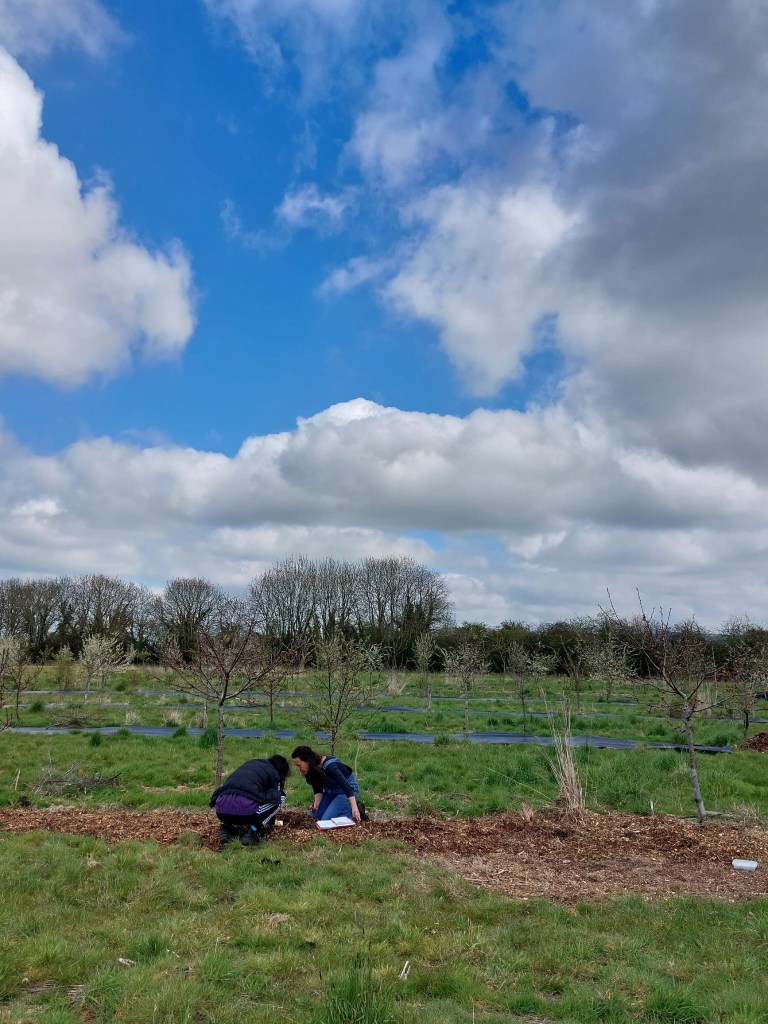
Measuring Chlorosis
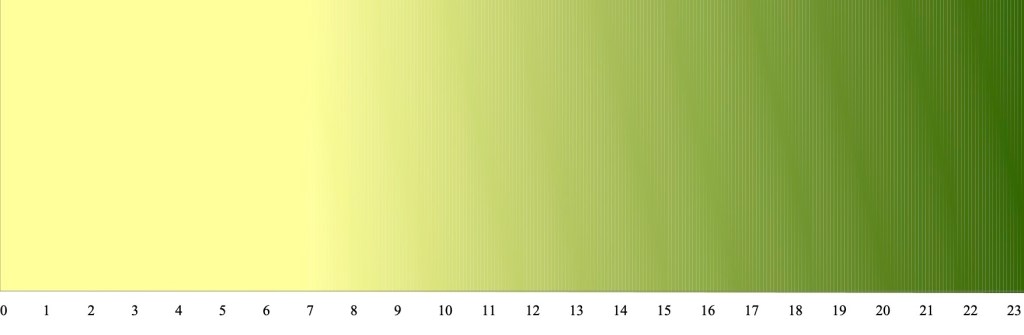
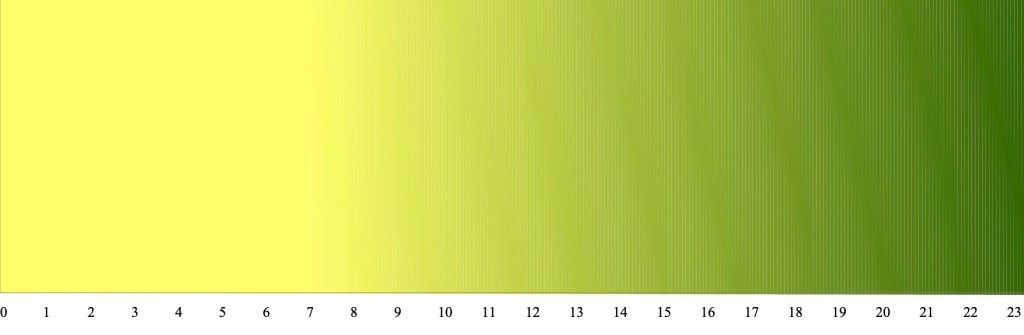
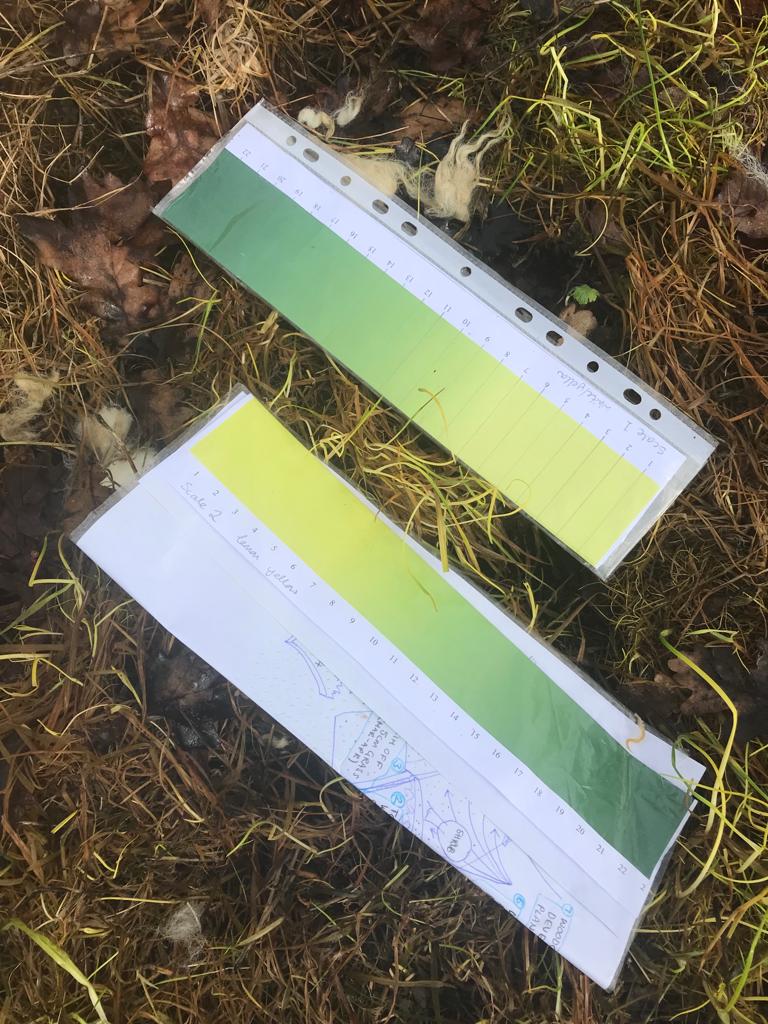
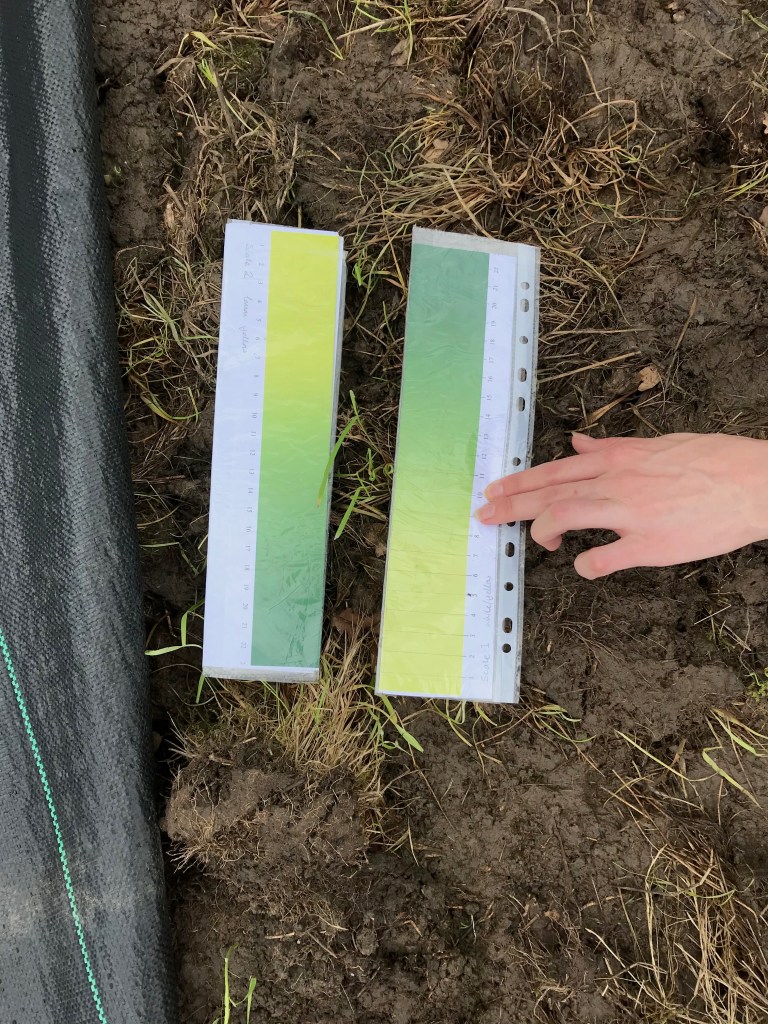
When deprived of light, green plants are unable to photosynthesise and leaves will turn yellow (become chlorotic) and then black (necrotic). However, even necrotic-looking grass can still recover because it stores so much energy in its distributed root system, so I will probably plant though my mulch materials where possible. I thought it would be interesting to measure how quickly glass under the mulches becomes chlorotic. I couldn’t find any scale online so created one. Ranging from a healthy dark green to pale yellow at numbered intervals I used the scale to track progress. I actually created two, one going from green to a pale lemony yellow and another going to a whiter yellow. More pictures in the gallery. For each reading, we measured 1m along from the previous reading and half way across the strip. The chlorosis scale was compared to the greenest blades of grass in the sample area (about 30cm diameter).
We also measured how long it took to set up the rows and how much was spent on each approach.

Results
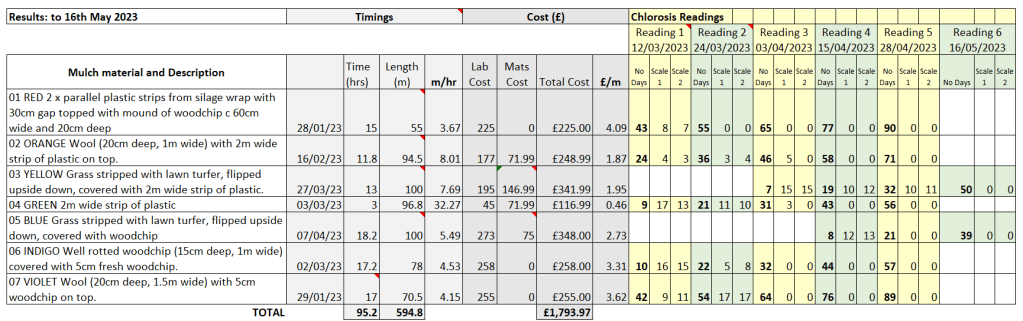
Observations
- The quickest method was using a 2m wide strip of plastic – we worked at 32.2 metres/hour. (green row)
- The slowest method was using recycled plastic combined with woodchip – we worked at 3.7metres/hour. (red row)
- The cheapest method was, again, using a 2m wide strip of plastic – it cost 46p / metre. (green row)
- The most expensive method was, again, using recycled plastic combined with woodchip – it cost £4 / metre. (red row)
- The most effective method was either flipping the grass and covering with woodchip which took only 21 days (blue row) or deep layer of woodchip which took 32 days (indigo row). Since we have only taken one 00 reading from blue row, it’s possible the result was an anomaly.
- The least effective method was wool topped with woodchip (violet row). Although the wool layer seemed to be creating a continuous light barrier it became clear that some areas were more opaque than others when grass, thistle and hogweed managed to grow through in certain locations.
- Wool was extremely quick to put down and didn’t blow away in the wind. The woodchip layer was very thin, intended only to hold down the wool. Given that putting down the woodchip was the most time consuming part of that process, it would be worth trying a thicker layer of wool without bothering to top with woodchip.
- The lawn turfer was very difficult to use because the grass surface was uneven and the soil was very wet.
- The plastic membrane was sometimes dislodged by wind and needed to be disentangled from nearby plants. When using year-old pegs from the barn, the heads snapped off and so the plastic pegs supplied might not be reusable.
- Some of these methods used natural materials that will break down and enrich the soil. Others use reusable plastic.
The next steps with these rows will be to direct plant into them.
Possible future experiments
- We will compare how easy it is to sow seeds and young plants.
- We could also compare the soil food web in these rows by doing worm counts. This would show which of these methods created the healthiest soil.
- It would be interesting to do a carbon footprint calculation for the materials used, taking into account their full lifecycle, e.g. transport to site, manufacturing and processing.
